作为智能家居的爱好者,将电网数据接入HA可谓是有诸多好处,苦于电网应用更新,导致之前好多的用电数据获取的方式我们现在无法使用。本文根据网友提供的信息收集接入电网的可用教程来了,感谢开源作者的无私奉献。这篇可谓是喂饭级教程。废话不多说,开始展示: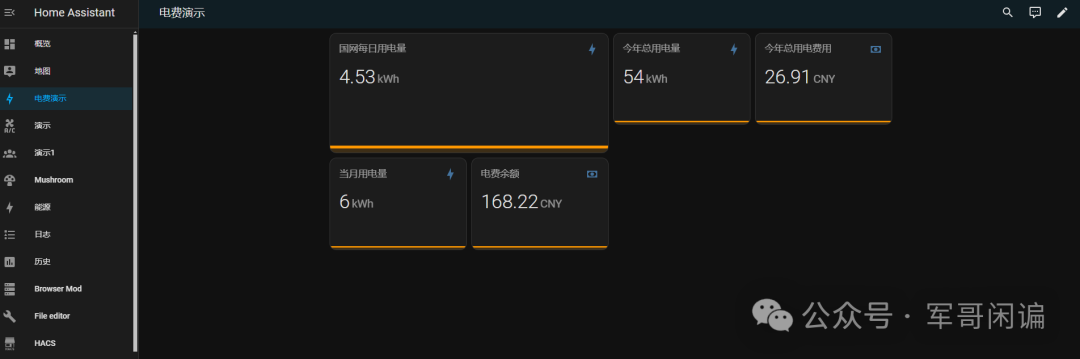 本次我们使用的方案是github上开源的项目:sgcc_electricity_newgit hub地址:https://github.com/ARC-MX/sgcc_electricity_newgitee地址:https://gitee.com/ARC-MX/sgcc_electricity_new本次我们安装的方式是Add-on的方式进行安装,因为这种方式我发现是最容易被使用的方式。本人使用的是虚拟机安装的HA。添加add-on存储库1. 打开Homeassistant.1.1 设置 -- > 加载项:
 1.2 点击右下角的加载项商店:
 1.3 点击右上角的3个点--->仓库
 1.4 输入库地址-->点保存
在弹出的对话框中输入sgcc electricity new存储库地址
地址:https://github.com/ARC-MX/sgcc_electricity_new
推荐使用国内源:https://gitee.com/ARC-MX/sgcc_electricity_new
 2. 安装add-on2.1 点击右上角的三个点菜单 --> 检查更新
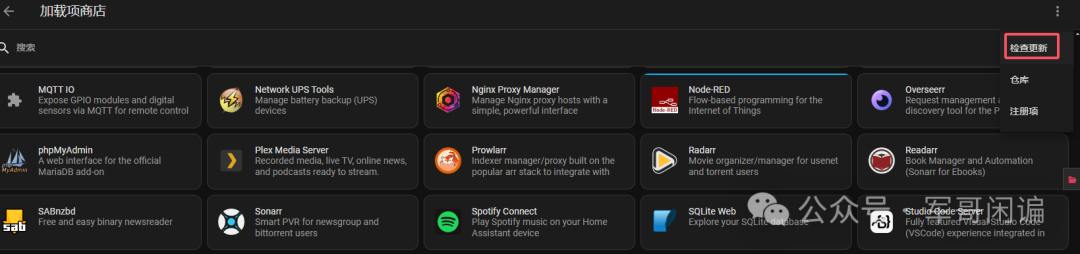 在列表中找到新添加的第三方 Add-on点击想要安装的 Add-on
 点击 "INSTALL" 或 "安装" 开始安装
 等待安装完成
 2.2 配置和启动安装完成后,点击 "CONFIGURATION" 或 "配置" 标签根据需要修改配置参数
 phone 和 password 是国家电网登录的手机号和密码hass_token是Ha里面给第三方应用生成的授权码,不懂怎么获取的可以看前面nodered的文章,里面有如何获取hass_koken的描述。在Home Assistant中安装Node-RED教程
- 点击 "保存" 保存配置
- 返回 "信息" 标签页
- 点击 ""启动" 启动 Add-on启动成功如下图:
 启动后,点击 "日志" 标签页,可以看到Add-on的运行状态
 等待程序执行,获取成功数据以后会自动创建sensor实体,不用我们手动改config文件。看到如下日志说明sensor实体已经更新成功:
 3. 转到仪表盘添加前端展示,代码如下:
cards:- type: horizontal-stackcards:- animate: trueentities:- entity: sensor.last_electricity_usage_0065name: 国网每日用电量aggregate_func: firstshow_state: trueshow_points: truegroup_by: datehour24: truehours_to_show: 240type: custom:mini-graph-card- type: horizontal-stackcards:- animate: trueentities:- entity: sensor.month_electricity_usage_0065name: 当月用电量aggregate_func: firstshow_state: trueshow_points: truegroup_by: datehour24: truehours_to_show: 240type: custom:mini-graph-card- animate: trueentities:- entity: sensor.electricity_charge_balance_0065name: 电费余额aggregate_func: firstshow_state: trueshow_points: truegroup_by: datehour24: truehours_to_show: 240type: custom:mini-graph-card- type: horizontal-stackcards:- animate: trueentities:- entity: sensor.yearly_electricity_usage_0065name: 今年总用电量aggregate_func: firstshow_state: trueshow_points: truegroup_by: datehour24: truehours_to_show: 240type: custom:mini-graph-card- animate: trueentities:- entity: sensor.yearly_electricity_charge_0065name: 今年总用电费用aggregate_func: firstshow_state: trueshow_points: truegroup_by: datehour24: truehours_to_show: 240type: custom:mini-graph-cardtype: vertical-stack
我们要调整的就是把sensor实体的后4位改成我们自己的用电户号就可以。创作不易欢迎大家点赞、转发、收藏。你的点赞支持是博主创作的最大动力。