周末学习不停歇,最近新开一个VUE3全新系列,这一系列会从0开始学习VUE3,使用Vite、TS、Pinia、Element-Plus、mittBus等新知识点,既是查漏补缺,也是知识分享。
代码地址:
https://github.com/anjoy8/bcvp.vue3.git
这是每篇文章一节课一个分支,方便大家学习,会慢慢的将blog.admin项目进行翻新,使用的后端接口还是BlogCore。
系列文章:
本文参考的是开源项目
https://gitee.com/HalseySpicy/Geeker-Admin/tree/template
分步骤讲解前端框架中的每一个核心逻辑,之前我们已经把左侧的动态菜单路由渲染出来了,今天讲解如何实现每一个路由下的动态按钮的渲染,真正实现通过配置就可以控制按钮的动态显隐,效果图:
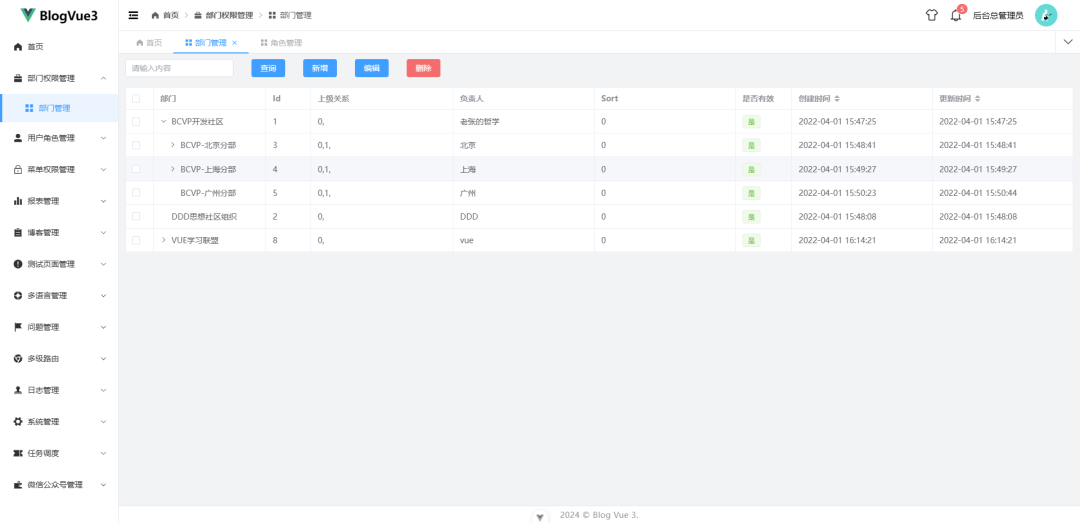
如果看过我的BlogAdmin项目就知道,我是将按钮级别权限做到了完全动态化,通过组件的形式,将当前路由下的权限按钮进行动态渲染的,所以需要一个工具条。
新建srccomponentstoolbar.vue
template>el-col v-if="buttonList != null && buttonList.length > 0" :span="24" class="toolbar" style="padding-bottom: 0px;">el-form :inline="true" @submit.prevent>el-form-item>el-input v-model="searchVal" clearable placeholder="请输入内容">el-input>el-form-item>el-form-item v-for="item in buttonList" :key="item.id">el-button :type="item.Func && (/handleDel|stop/i.test(item.Func) ? 'danger' : 'primary')"v-if="!item.IsHide" @click="callFunc(item)">{{ item.name }}el-button>el-form-item>el-form>el-col>template>script setup lang="ts">import { ref, toRaw } from 'vue';import { defineProps } from 'vue';import mittBus from "@/utils/mittBusT";const props = definePropsbuttonList: Menu.MenuOptions[]}>();const searchVal = ref('');const callFunc = (cnt: Menu.MenuOptions) => {// 使用 toRaw 获取原始对象const rawItem = toRaw(cnt);rawItem.search = searchVal.value;mittBus.emit("callFunction", rawItem);};script>
根据需要,点击按钮的时候,因为是单独的组件,所以要发送一个事件,这里就用mittBus事件总线的方式,VUE3内置也有这种消息传递方式,可以根据需要调整,另外,发送事件的时候,因为需要发送一个数据对象——当前路由对象,以便监听的时候,可以根据这个对象中的前端function方法,触发点击事件,因此就需要新定义了一个总线,传递了一个泛型:
新建文件
srcutilsmittBusT.ts
import mitt from 'mitt';// 定义事件类型type Events = {callFunction: Menu.MenuOptions;};// 创建已键入的 mitt 实例const emitter = mitt();export default emitter;
到这里工具组件就定义好了,接下来就需要对这个监听这个事件,通过当前路由匹配到其下有多少有效的按钮,进行渲染。
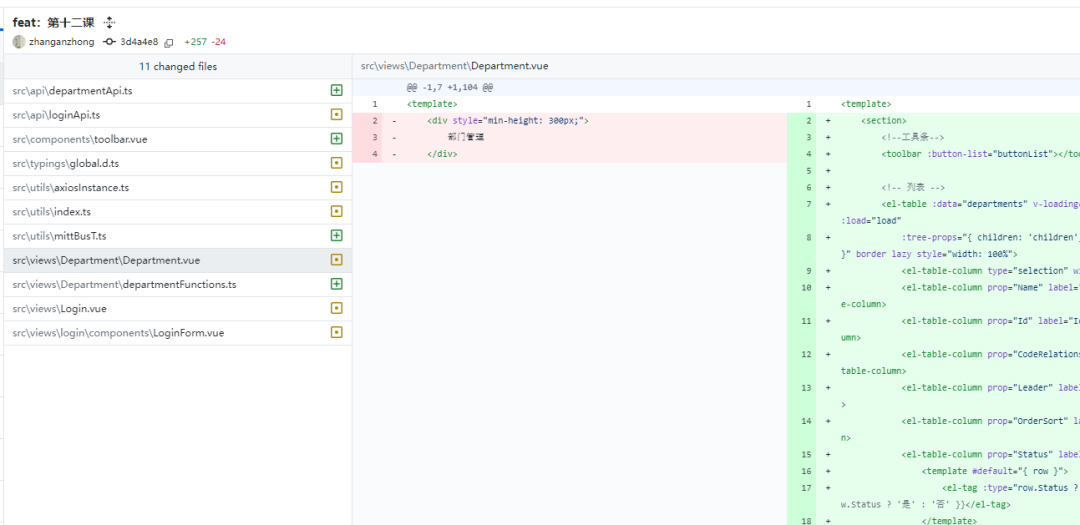
在之前的部门页面Department.vue中,修改代码:
template>section>toolbar :button-list="buttonList">toolbar>section>template>script setup lang="ts" name="department">import { ref, onMounted, onUnmounted } from 'vue';import Toolbar from "@/components/toolbar.vue";import mittBusT from "@/utils/mittBusT";import { getButtonList } from "@/utils";import { useAuthMenuStore } from "@/stores/modules/authMenu";// 定义 filtersconst filters = refname: string }>({ name: '' });// 加载按钮const buttonList = ref// 创建函数映射表const functionMap: RecordFunction> = {// 比如查询 handleQuery,// 可以在此添加其他需要调用的函数};const callFunction = (item: Menu.MenuOptions) => {const filters = {name: item.search,};if (item.Func && typeof item.Func === 'string') {// 假设所有可用函数都在 functionMap 中定义const func = functionMap[item.Func];if (typeof func === 'function') {func(filters);} else {console.error(`Function ${item.Func} is not defined in functionMap.`);}} else {console.error('Func property is not a valid string.');}};// 钩子函数onMounted(async () => {const authStore = useAuthMenuStore();const routers = authStore.authMenuListGet;buttonList.value = getButtonList(window.location.pathname, routers);// 监听事件mittBusT.on('callFunction', callFunction);});// 在组件卸载时移除监听onUnmounted(() => {mittBusT.off('callFunction', callFunction);});script>
可以看到,主要就是页面加载完成钩子的时候,先从Pinia中拉取按钮列表,传递给toolbar组件,然后用事件总线来监听这个事件,同时定义了一个map,因为vue3无法使用this作用域来获取function,所以我就通过import的形式,这样不仅能渲染按钮,也能触发js的function效果:

点击新增按钮,就能唤起对应的function了,当然这里还没写,那就用查询来做个实验吧。
在每个页面中,都需要定义当前页面的function.ts,这样不仅可以起到封装的作用,主要也是主页面回调函数的作用,
一、首先对接后端接口,定义规范的写法,有入参和出参的interface
新增srcapidepartmentApi.ts
import { get, type BaseResponse } from '@/utils/axiosInstance';/*** 请求的入参接口* @interface DepartmentRequest*/export interface DepartmentRequest {page: number;key: string;f: string;}/*** 部门响应接口* @interface Department*/export interface Department {CodeRelationship: string;Name: string;Leader: string;OrderSort: number;Status: boolean;IsDeleted: boolean;CreateBy: string;CreateTime: string;ModifyBy: string | null;ModifyTime: string;hasChildren: boolean;Pid: string;PidArr: string[];Id: string;}// 获取菜单列表export const getDepartmentListApi = async (params: DepartmentRequest): Promise> => {try {const response = await get>('/api/department/getTreeTable', params);return response;} catch (error) {throw new Error('请求失败');}};
如果发现和自己代码不一样,可以自定义修改。
新增srcviewsDepartmentdepartmentFunctions.ts
// departmentFunctions.tsimport { ref } from 'vue';import { getDepartmentListApi } from '@/api/departmentApi';import type { DepartmentRequest, Department } from '@/api/departmentApi';export const departments = ref([]);export const listLoading = ref(false);export const page = ref(1);export const handleQuery = async (filters: { name: string }) => {const para = ref({page: page.value,f: '0',key: filters.name,});listLoading.value = true;try {const { response } = await getDepartmentListApi(para.value);departments.value = response ?? [];} finally {listLoading.value = false;}};
然后就可以在业务页面进行渲染了,直接用el-table的形式,目前本页面没用到分页,因为是一个树形结构。
在department.vue中,完整代码如下:
template>section>toolbar :button-list="buttonList">toolbar>el-table :data="departments" v-loading="listLoading" row-key="Id" :load="load":tree-props="{ children: 'children', hasChildren: 'hasChildren' }" border lazy style="width: 100%">el-table-column type="selection" width="50">el-table-column>el-table-column prop="Name" label="部门" width="200">el-table-column>el-table-column prop="Id" label="Id" width="80">el-table-column>el-table-column prop="CodeRelationship" label="上级关系">el-table-column>el-table-column prop="Leader" label="负责人">el-table-column>el-table-column prop="OrderSort" label="Sort">el-table-column>el-table-column prop="Status" label="是否有效" width="100">template #default="{ row }">el-tag :type="row.Status ? 'success' : 'danger'">{{ row.Status ? '是' : '否' }}el-tag>template>el-table-column>el-table-column prop="CreateTime" label="创建时间" :formatter="formatCreateTime" width="250"sortable>el-table-column>el-table-column prop="ModifyTime" label="更新时间" :formatter="formatModifyTime" width="250"sortable>el-table-column>el-table>section>template>script setup lang="ts" name="department">import { ref, onMounted, onUnmounted } from 'vue';import Toolbar from "@/components/toolbar.vue";import mittBusT from "@/utils/mittBusT";import { getButtonList } from "@/utils";import { useAuthMenuStore } from "@/stores/modules/authMenu";import { getDepartmentListApi } from '@/api/departmentApi';import type { Department, DepartmentRequest } from "@/api/departmentApi";// 从 departmentFunctions.ts 导入import { handleQuery, departments, listLoading, page } from './departmentFunctions';// 定义 filtersconst filters = refname: string }>({ name: '' });// 加载按钮const buttonList = ref// 创建函数映射表const functionMap: RecordFunction> = {handleQuery,// 可以在此添加其他需要调用的函数};const callFunction = (item: Menu.MenuOptions) => {const filters = {name: item.search,};if (item.Func && typeof item.Func === 'string') {// 假设所有可用函数都在 functionMap 中定义const func = functionMap[item.Func];if (typeof func === 'function') {func(filters);} else {console.error(`Function ${item.Func} is not defined in functionMap.`);}} else {console.error('Func property is not a valid string.');}};// 实现懒加载数据功能const load = async (tree: Department, treeNode: any, resolve: (data: Department[]) => void) => {const para = ref({page: page.value,f: tree.Id,key: filters.value.name,});try {const { response } = await getDepartmentListApi(para.value);resolve(response);} catch (error) {console.error('Error loading data:', error);resolve([]); // 在错误情况下返回空数据以继续渲染}};// 格式化时间const formatCreateTime = (row: Department) => row.CreateTime;const formatModifyTime = (row: Department) => row.ModifyTime;// 钩子函数onMounted(async () => {const authStore = useAuthMenuStore();const routers = authStore.authMenuListGet;buttonList.value = getButtonList(window.location.pathname, routers);// 监听事件mittBusT.on('callFunction', callFunction);// 获取数据await handleQuery(filters.value);});// 在组件卸载时移除监听onUnmounted(() => {mittBusT.off('callFunction', callFunction);});script>
最终的渲染效果,没问题,试试路由跳转和页面刷新都没问题,按钮也都渲染了,查询按钮也能自动加载函数function,剩下的就是把新增、编辑、删除补充完整。
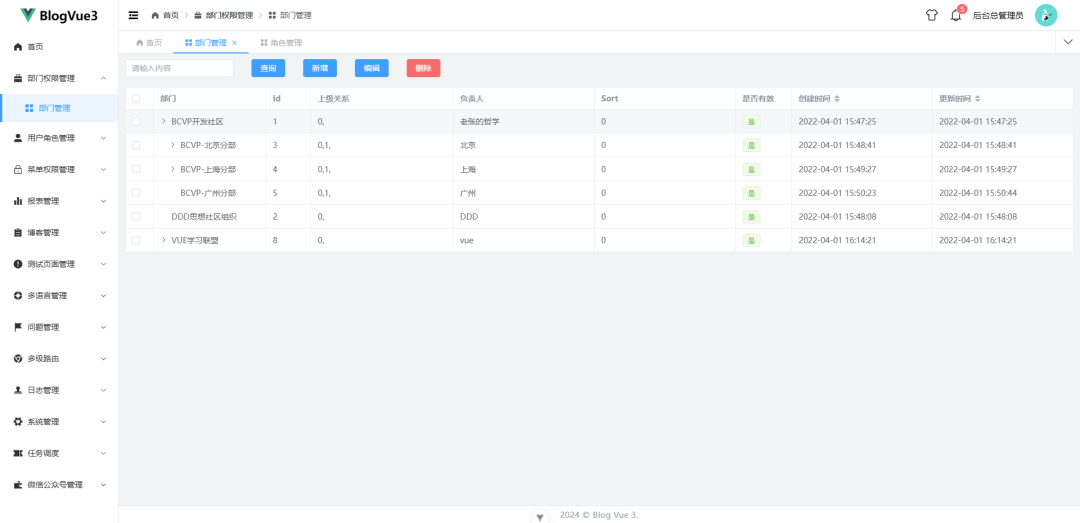
下篇文章我们继续对框架进行更新,开启页面级别的数据填充,实现表格渲染,敬请期待。