放假不停歇,趁着假期学习下VUE3相关的内容,一方面是自己保持活力,另一方面也是工作需要,本系列是我的自学教程,如果有从0开始学习VUE3的,可以跟着一起练习下,毕竟前端我也是泥腿子出身,这一系列会使用Vite、TS、Pinia、Element-Plus等新知识点,既是查漏补缺,也是知识分享。
代码地址:
https://github.com/anjoy8/bcvp.vue3.git
这是每篇文章一节课一个分支,方便大家学习,会慢慢的将blog.admin项目进行翻新,使用的后端接口还是BlogCore。
系列文章:
本文参考的是开源项目
https://gitee.com/HalseySpicy/Geeker-Admin/tree/template
在上一节课讲到登录以后,开始陆续将授权,今天先说下获取用户信息接口,争取每篇文章至少一个接口。
在srctypings路径下,新增global.d.ts文件,定义一个用户接口,并定义一个命名空间,保障隔离,下篇文章在说到菜单权限的时候,还会用到:
/* User模块 */declare namespace User {export interface UserResponse {uLoginName: string;uLoginPWD: string;uRealName: string;uStatus: number;DepartmentId: string;uRemark: string | null;uCreateTime: string;uUpdateTime: string;uLastErrTime: string;uErrorCount: number;name: string;sex: number;age: number;birth: string;addr: string | null;tdIsDelete: boolean;RoleNames: string[];Dids: string[];DepartmentName: string | null;uID: string;RIDs: string[];}}
import { useAuthStore } from "@/stores/auth";export const userInfo = async (): Promise> => {try {const userStore = useAuthStore();const response = await get>('/api/user/getInfoByToken', {token: userStore.token,});return response;} catch (error) {throw new Error('请求失败');}};

用户信息也可以直接手写到localstorage里,不过习惯了状态管理,把全局数据交给状态管理器pinia更好一些,也容易维护:
import { defineStore } from 'pinia';export const useUserInfoStore = defineStore({id: 'userinfo',state: (): { user: User.UserResponse | null } => ({user: null}),actions: {setUser(user: User.UserResponse) {this.user = user;localStorage.setItem('userinfo', JSON.stringify(user));},getUser() {const user = localStorage.getItem('userinfo');if (user) {this.user = JSON.parse(user);}},clearUser() {this.user = null;localStorage.removeItem('userinfo');}}});
修改登录接口,把用户信息给存下来:
import { login, userInfo } from '@/api/loginApi';import { useUserInfoStore } from '@/stores/userInfo';const userInfoStore = useUserInfoStore();const userInfoRes: BaseResponse = await userInfo();userInfoStore.setUser(userInfoRes.response);

重新登录页面
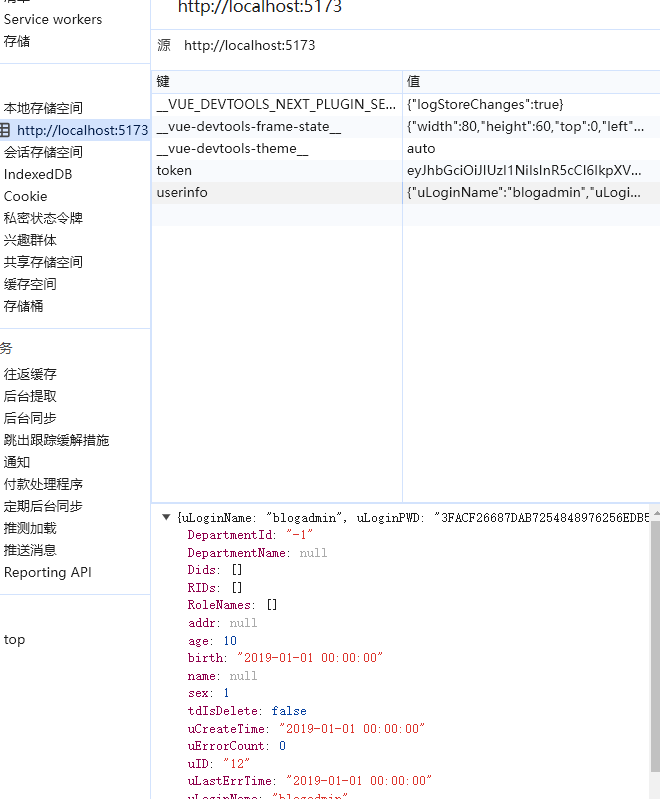
可以看到用户信息已经存上了
下篇文章我们写一下获取权限菜单接口。